

Start: 3 Instagram Tags for More Exposure
Want more people to see your Instagram posts? Are you using Instagram tags effectively?
Add a Tag to an Instagram Feed Post
Now let’s walk through the steps to tag another account on your Instagram content. It’s important that you only tag people or brands that are actually in your post. Don’t tag a bunch of people in a post in which they don’t appear simply to get their attention. This is discouraged and may get you flagged for spam and hurt your chances of success on Instagram.
Add a Tag to a New Instagram Feed Post
To add a tag to a new feed post you’re uploading to Instagram, start a new post like normal with a photo or video. When you get to the caption screen, you’ll see an option to tag people.
If you’re uploading an image, tap anywhere on the photo and you’ll see a pop-up box where you can type in the name of the person you want to tag. Select that account from the list and the tag will appear on your image.
You can drag the tag to move it around on the screen so it’s right over their head or off to the side if you don’t want to cover up your image.
If you’re uploading a video, tap on the Tag People option and you’ll be able to add the tags of people below the video.
To add multiple people, simply tap anywhere on the image again and you can add another person. You can tag up to 20 people per post.
When you’re done tagging people, tap on the checkmark in the upper-right corner to return to your regular upload screen. Continue loading the post like normal and you’re all set.
Add a Tag to an Existing Instagram Post
If you want to go back and edit an existing post on your Instagram profile, you can do that too. Navigate to that piece of content in your gallery, tap on the three-dot icon in the top-right corner, and select the Edit option.
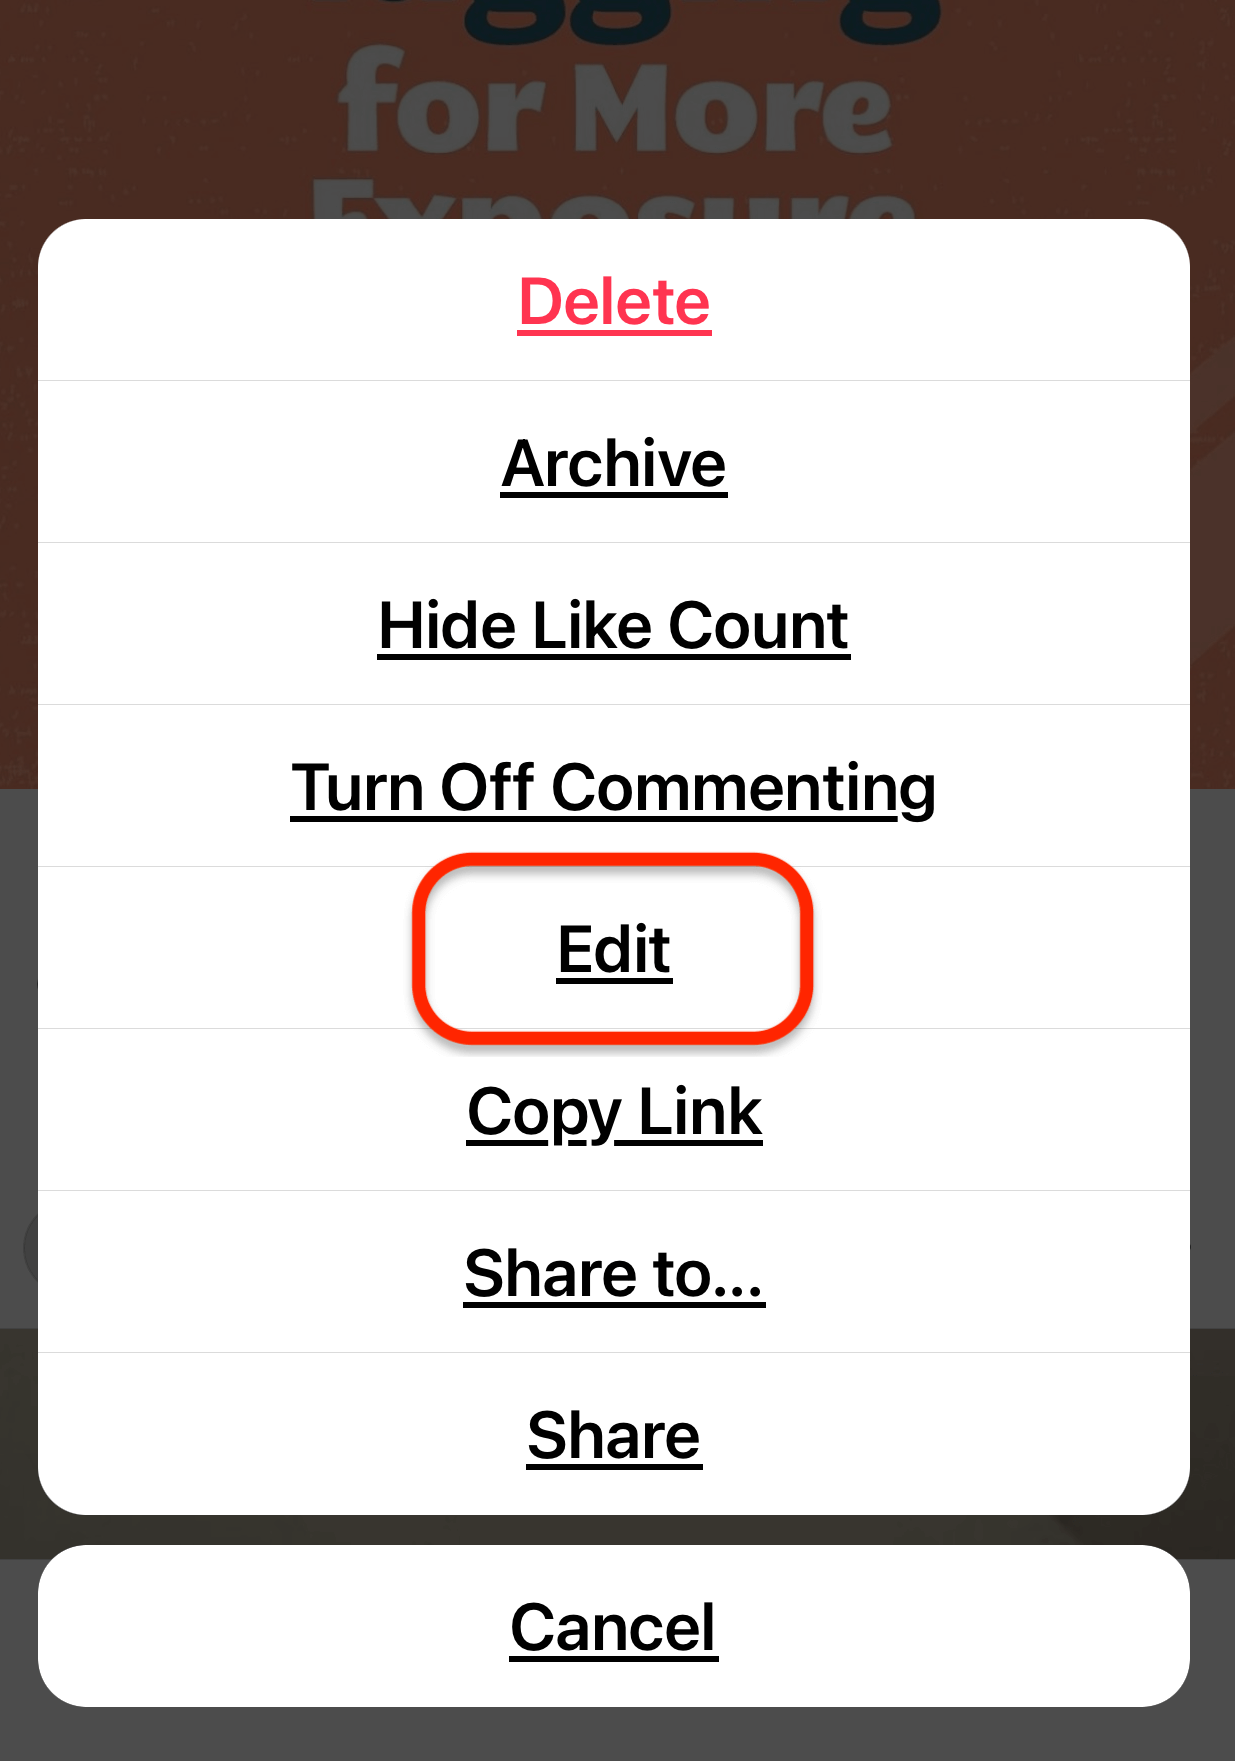
On the image itself, you’ll see the Tag People option in the lower-left corner. Simply tap on that, follow the same steps to type in the name, and select the person you want to tag in the image. When you’re done, simply save your changes.
#2: Remove Your Tag From an Instagram Post
Now that you know how to tag somebody in an Instagram post, chances are your account may get tagged in posts as well. But what if you don’t want to be tagged in that content? No worries! There’s a quick and easy way to remove the tag.
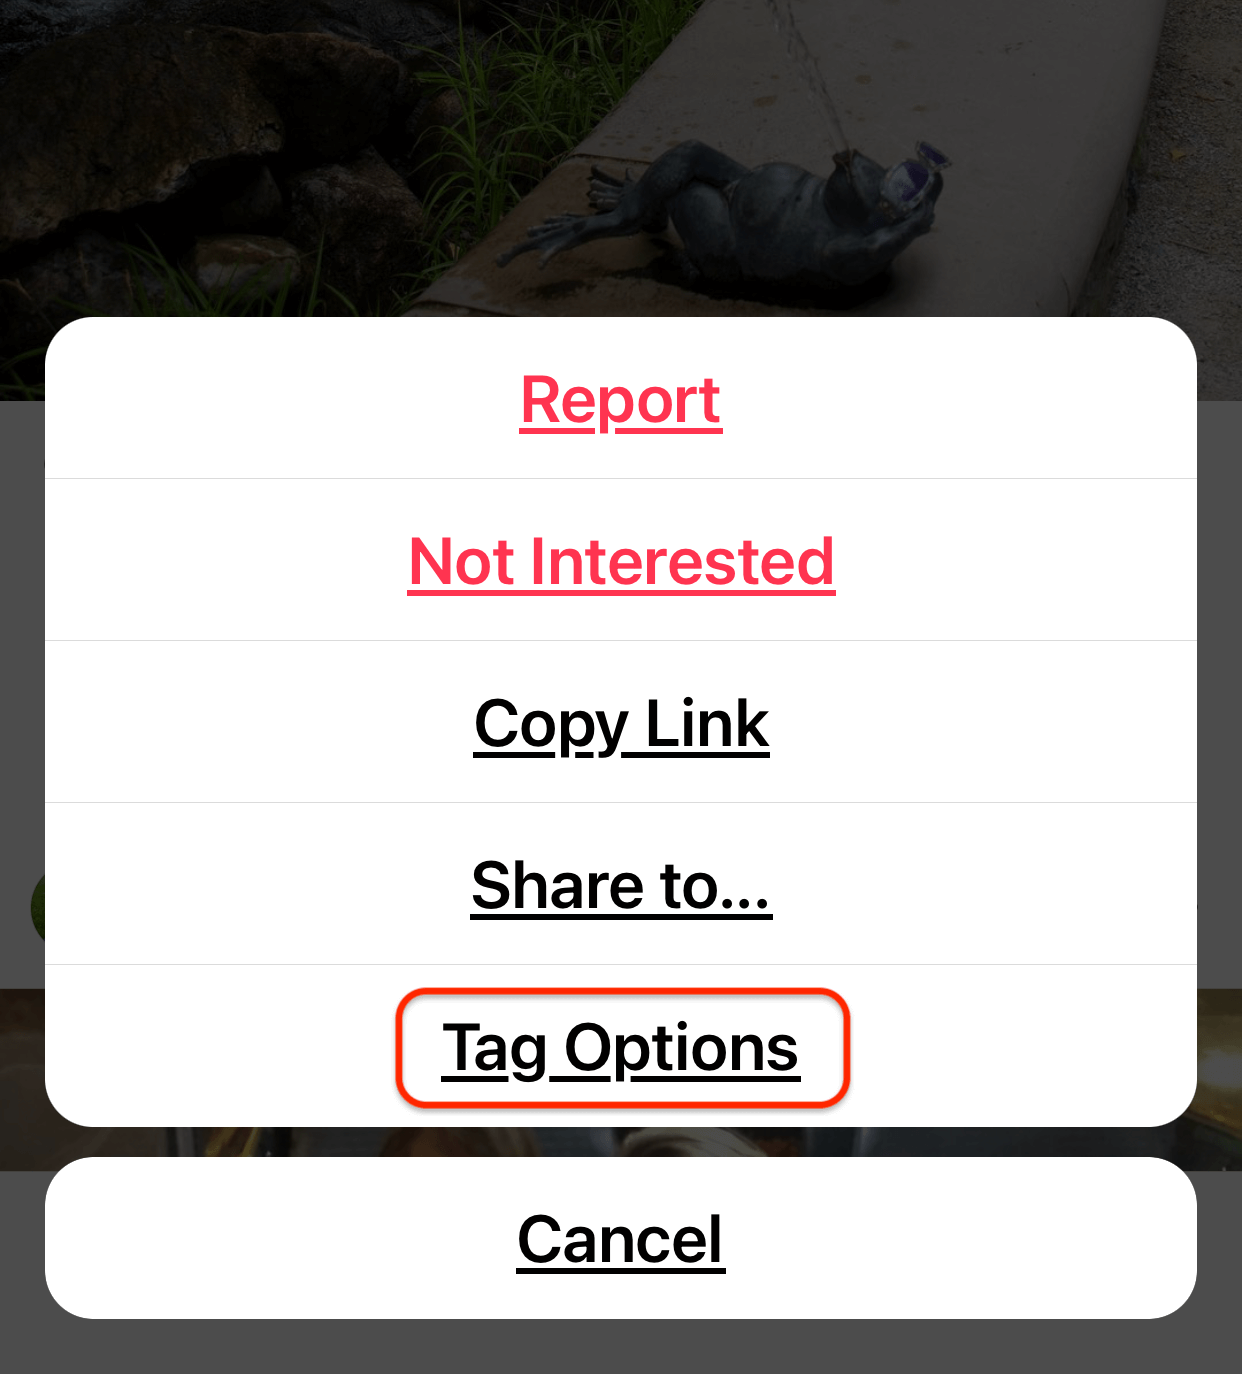
Go to the post you’ve been tagged in, and at the very top, tap the three-dot icon. In the pop-up, choose Tag Options.
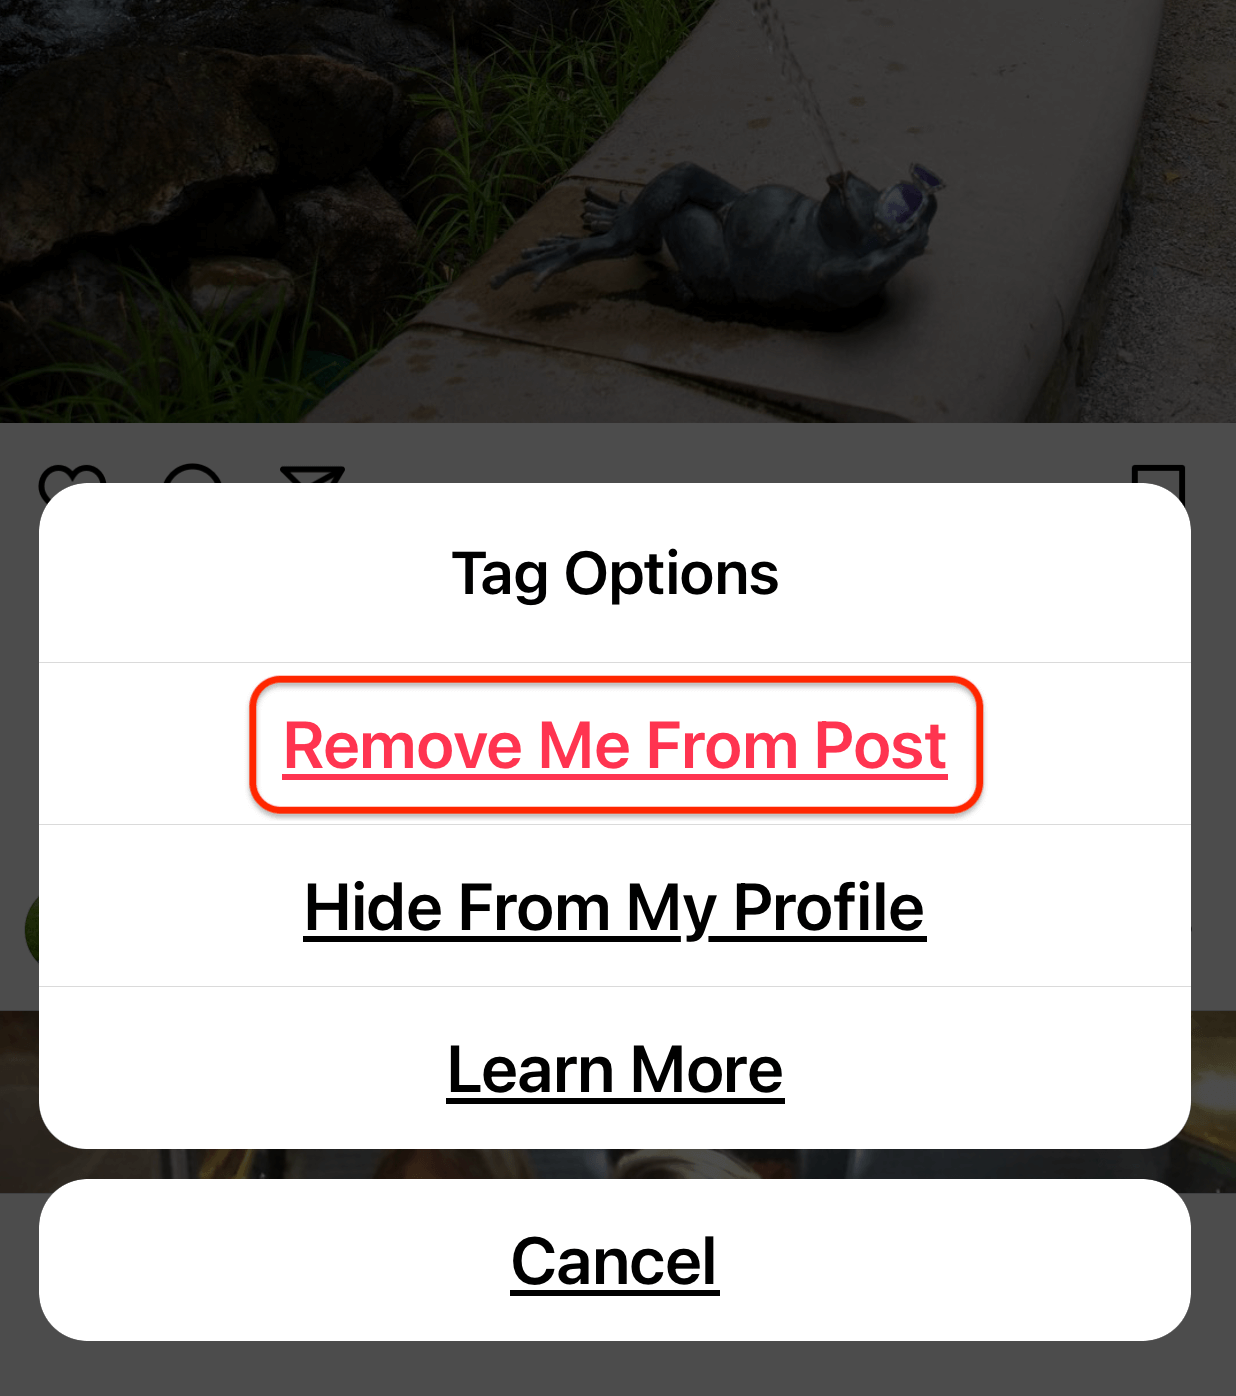
The last step is to tap on Remove Me From Post. Your tag is now removed and you won’t appear in that content anymore.
#3: Add a Location Tag to an Instagram Post
Another type of Instagram tag you can use to get more exposure is location tags.
When you tap on Tag Location on the caption screen, the location options will default to what’s near you. If you don’t see the location you want to tag, simply start typing the location you want and a list of matching options appears.
Select the location you want to use and you’ll see it on the caption screen. Now complete and publish your post as normal.
Once you upload your Instagram content, you’ll see that location appear right below your username. That’s actually clickable. Someone can tap on that and navigate to search results for that location.
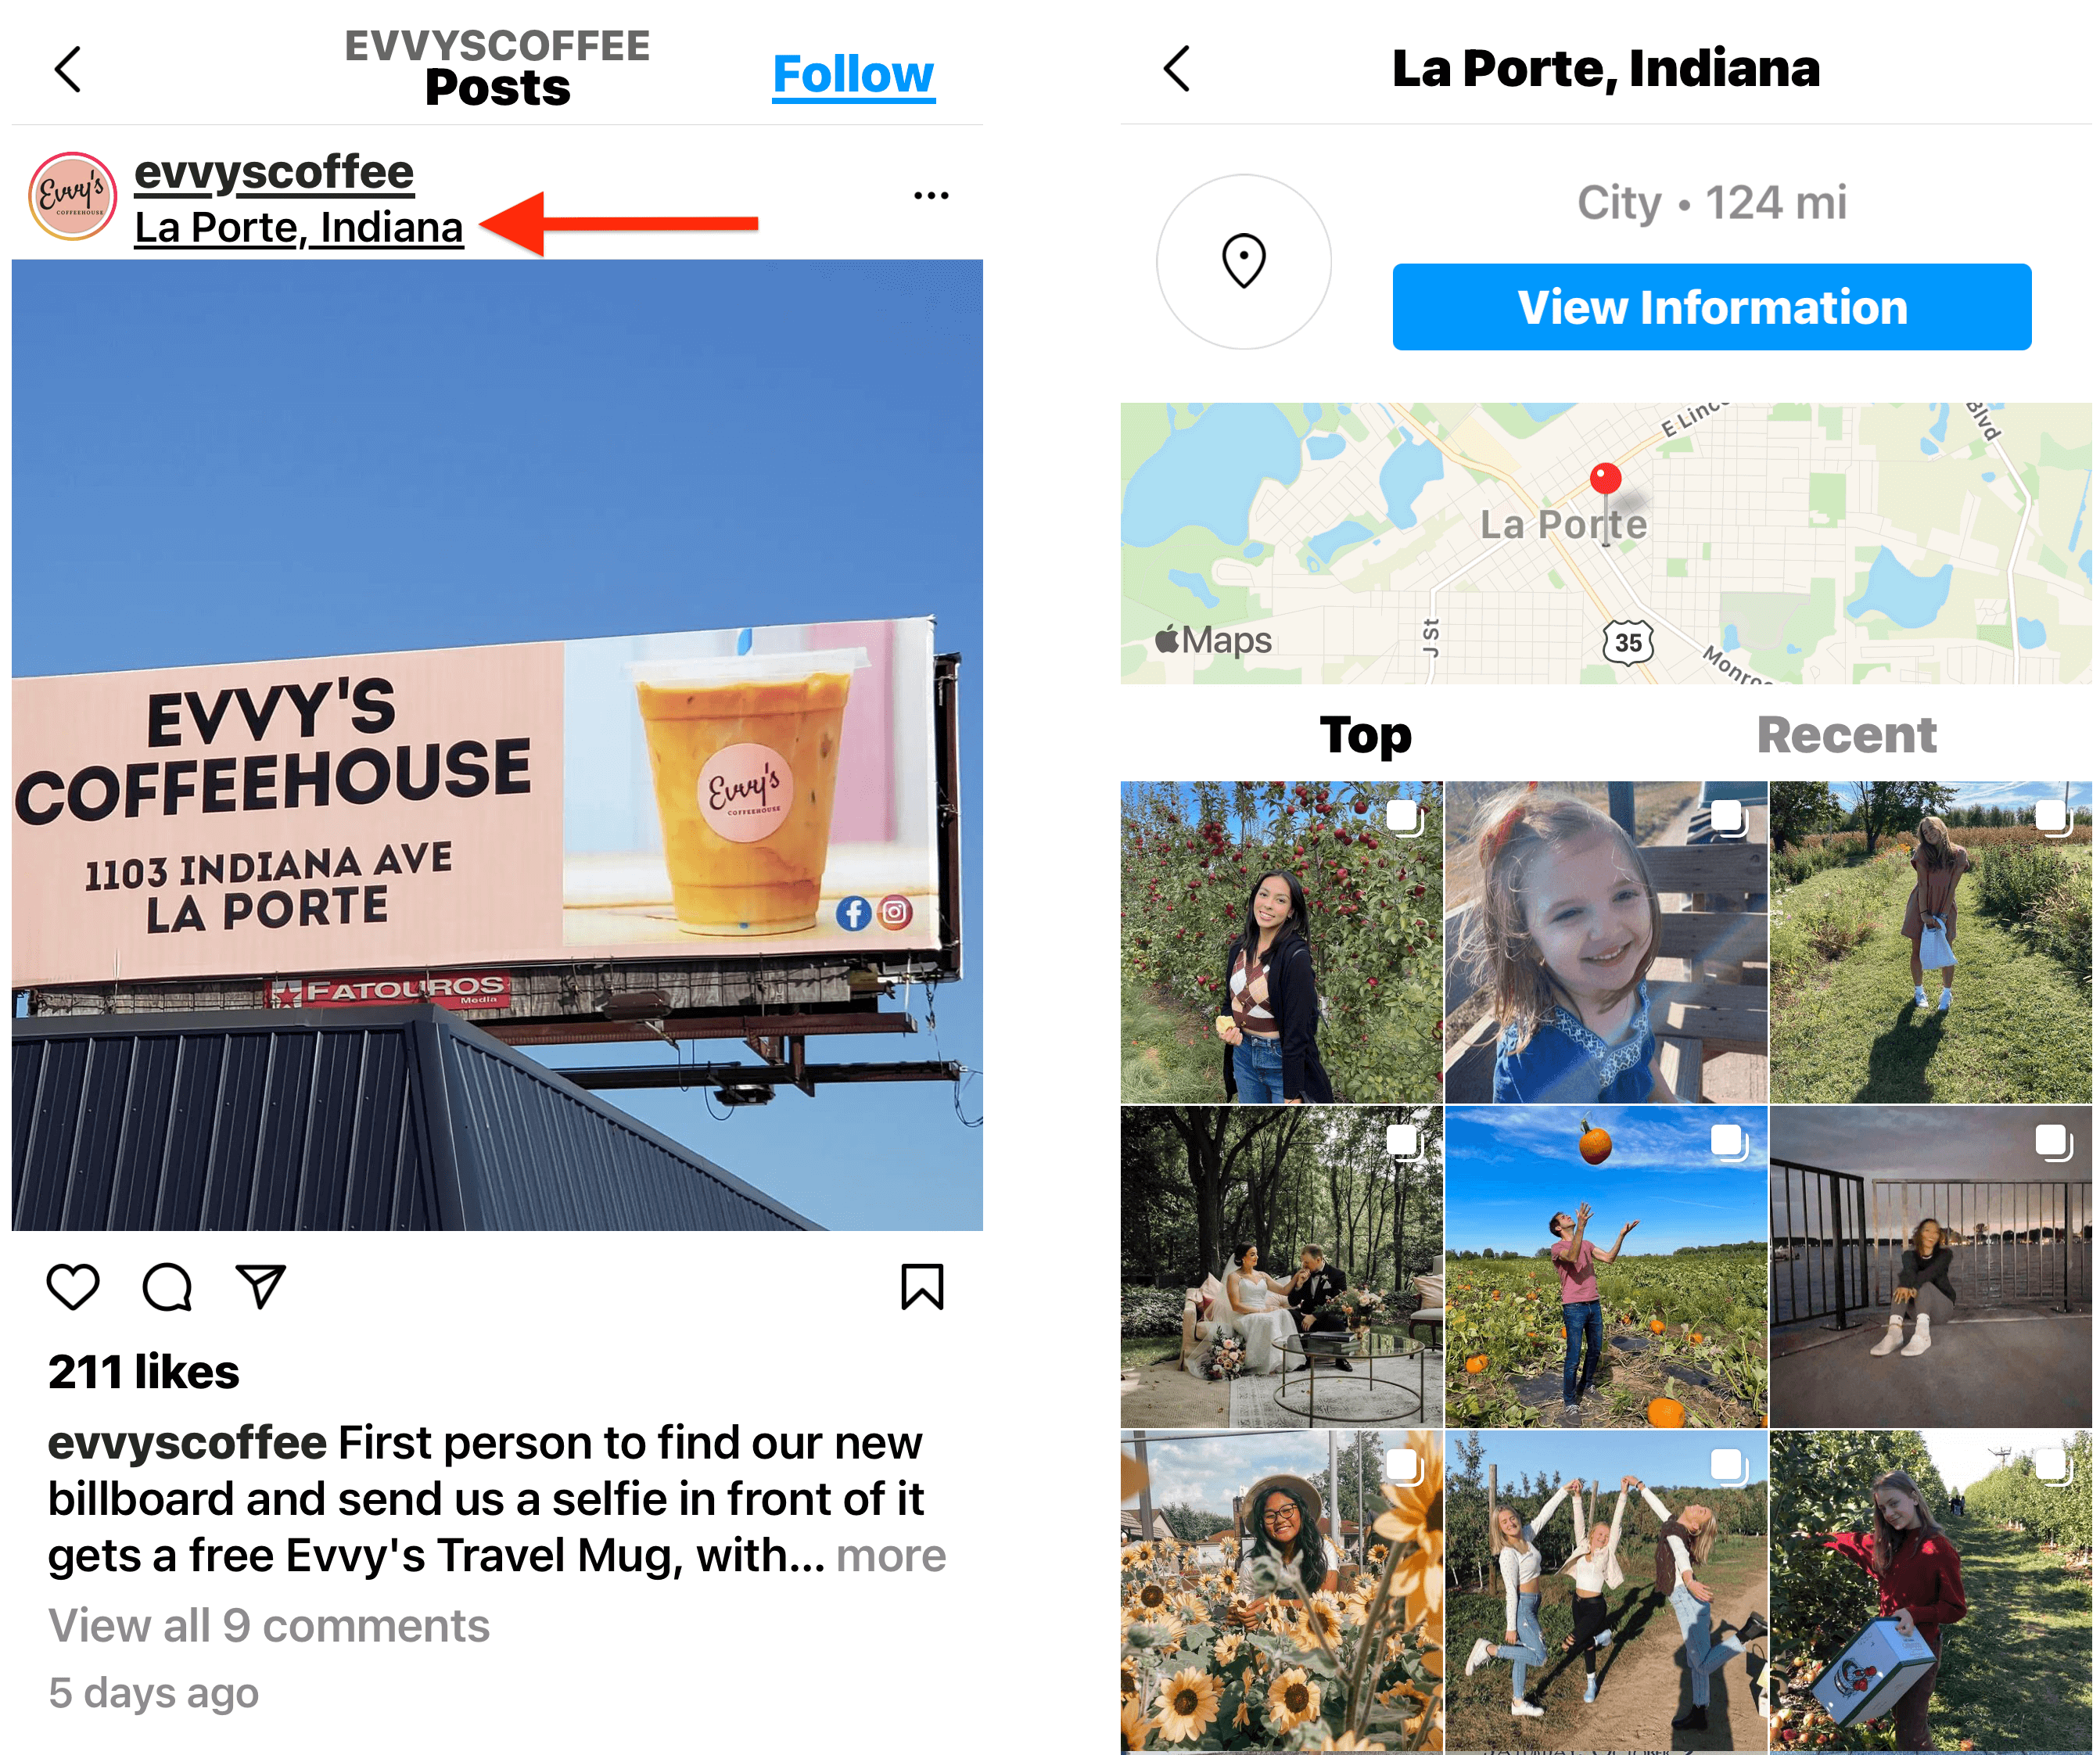
That brings me to the primary reason you want to use location tags: searchability. People on Instagram are looking at locations for things to do and what’s going on in the area, or to find out more about that business. If you’re tagging that location in your content, there’s a good chance you may show up in those search results and other people will see your content related to that location.
Pro Tip: If you’re a local business that’s tagging your location in your content, encourage your customers to tag your business location too. This will give anyone looking at that location a wider perspective of what it’s like at your business.


Recent Comments